Custom Integration with target as Azure Data Lake
Calibo Accelerate supports custom integration using various data sources with Databricks for integration, ingesting the data into an Azure Data Lake. For the sake of an example we are using the following combination:
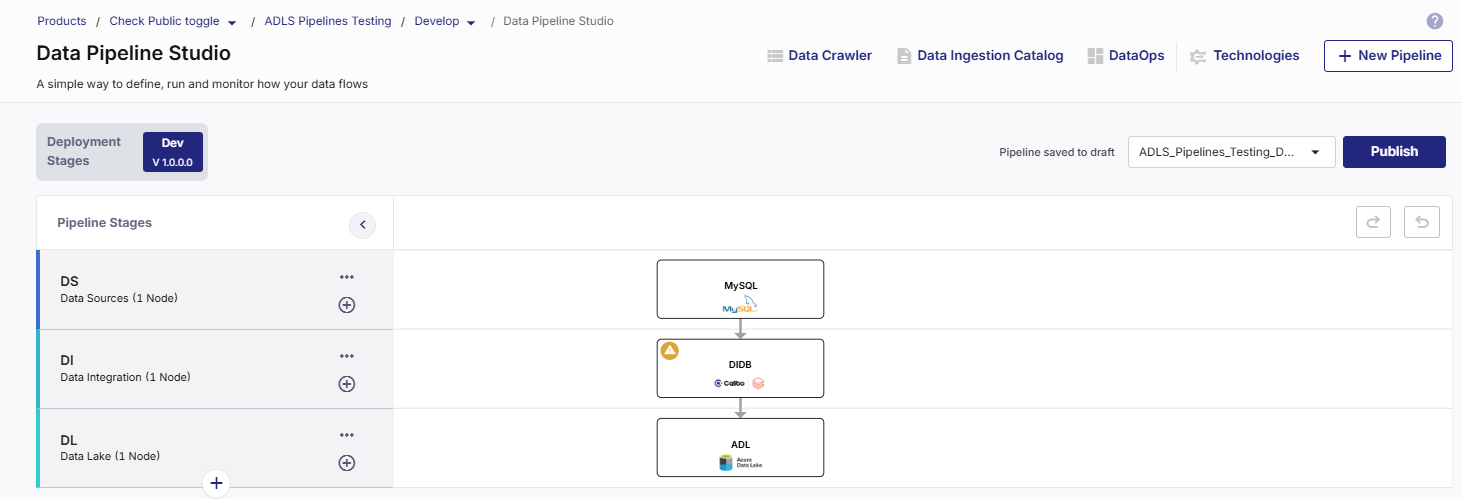
RDMBS - MySQL (as a data source) > Databricks (for custom integration) > ADLS (as a data lake)
The following targets are supported for Databricks custom integration:
| Source | Custom Integration | Data Lake |
|---|---|---|
| RDBMS - MySQL | Databricks | Azure Data Lake |
| RDBMS - Oracle Server | Databricks | Azure Data Lake |
| RDBMS - Microsoft SQL Server | Databricks | Azure Data Lake |
| RDBMS - PostgreSQL | Databricks | Azure Data Lake |
| RDBMS - Snowflake | Databricks | Azure Data Lake |
| FTP | Databricks | Azure Data Lake |
| SFTP | Databricks | Azure Data Lake |
| REST API | Databricks | Azure data Lake |
| Azure Data Lake | Databricks | Azure Data Lake |
To create a Databricks custom integration job
-
Sign in to Calibo Accelerate and navigate to Products.
-
Select a product and feature. Click the Develop stage of the feature.
-
Click Data Pipeline Studio.
-
Create a pipeline with the following stages and add the required technologies:

-
Configure the source and target nodes.
-
Click the data integration node and click Create Custom Job.

-
Complete the following steps to create the Databricks custom integration job:
 Job Name
-
Job Name - Provide a name for the custom integration job.
-
Node Rerun Attempts - Specify the number of times the job is rerun in case of failure. The default setting is done at the pipeline level.
-
Fault tolerance - Select the behaviour of the pipeline upon failure of a node. The options are:
-
Default - Subsequent nodes should be placed in a pending state, and the overall pipeline should show a failed status.
-
Skip on Failure - The descendant nodes should stop and skip execution.
-
Proceed on Failure - The descendant nodes should continue their normal operation on failure.
-
 Repository
In this step you create a repository to store the custom code for your integration job. Before creating a repository you are prompted to create a branch template if you haven't configured one already.

-
Click Configure Branch Template to create a branch template or click Proceed if you do not want to create a branch template.

Note:
If you do not configure a branch template, only the master branch is created in code repository.
-
In the Repository step, do one of the following:
-
Turn on the toggle for Use Existing Repository, provide a title and select a repository from the dropdown list.
-
To create a new repository, provide the following information:

-
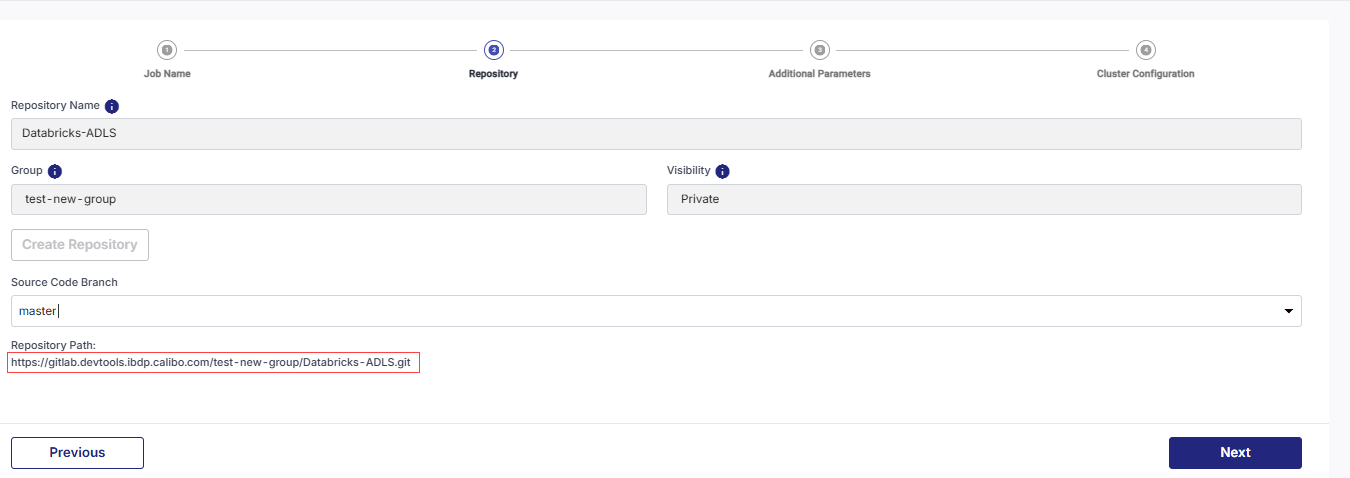
Repository Name - A repository name is provided in the default format. The repository name is populated in the following format: Technology Name - Product Name. For example if the technology being used is Databricks and the product name is ABC, then the repository name is Databricks-ABC. You can edit this name to create a custom name for the repository.

Note:
You can edit the repository name when you use the instance for the first time. Once the repository name is set, you cannot change it thereafter.
-
Group - Select a group to which you want to add this repository. Groups help you to organize, manage, and share the repositories for the product.
-
Visibility - Select the type of visibility that the repository must have. Choose from Public or Private.

Note:
The Group and Visibility fields are only visible if you configure GitLab as a source code repository.
-
Click Create Repository. Once the repository is created, the repository path is displayed.
-
Select Source Code Branch from the dropdown list.
-
Click Next.
-
 Additional Parameters
In this step, you can provide additional parameters that are used as source payload parameters.
Example 1: If you have an API that returns data related to a specific product or customer, the product name or customer ID could be passed as additional parameters, ensuring the job fetches the relevant data for that specific product or customer.
Example 2: If you're pulling product data from an API, an additional parameter like product_name="Product A" can be passed to the source system as part of the payload to ensure only data related to "Product A" is fetched.
Example 3: If you're fetching transaction data, the additional parameters start_date="2025-01-01" and end_date="2025-01-31" can be used in the source system's payload to only retrieve transactions within that date range.
You can either provide system-defined parameters or custom parameters to the integration job.
-
System Defined Parameters - Uncheck the parameters that you do not want to include with the integration job and click Next.
-
Custom Parameters - You can either add custom parameters manually or you can import them from a JSON file.
-
Add Manually - Provide a key and value. Mark the parameter as sensitive or mandatory depending on your requirement.
-
Import from JSON - You can download a template and create a JSON file with the required parameters or upload a JSON file directly.
-
Click Next.
 Cluster Configuration
You can select an all-purpose cluster or a job cluster to run the configured job. Since you are creating a custom integration job, you may require certain library versions for successfully running the integration job. To update the library versions, see Updating Cluster Libraries for Databricks
In case your Databricks cluster is not created through the Calibo Accelerate platform and you want to update custom environment variables, refer to the following:
Updating Custom Variables for a Databricks Cluster
 All Purpose Clusters
Cluster - Select an all-purpose cluster from the dropdown list, that you want to use for the data integration job.
 Job Cluster
Cluster Details Description Choose Cluster Provide a name for the job cluster that you want to create. Job Configuration Name Provide a name for the job cluster configuration. Databricks Runtime Version Select the appropriate Databricks version. Worker Type Select the worker type for the job cluster. Workers Enter the number of workers to be used for running the job in the job cluster.
You can either have a fixed number of workers or you can choose autoscaling.
Enable Autoscaling Autoscaling helps in scaling up or down the number of workers within the range specified by you. This helps in reallocating workers to a job during its compute-intensive phase. Once the compute requirement reduces the excess number of workers are removed. This helps control your resource costs. Cloud Infrastructure Details First on Demand Lets you pay for the compute capacity by the second. Availability Select from the following options:
-
Spot
-
On-demand
-
Spot with fallback
Zone Select a zone from the available options. Instance Profile ARN Provide an instance profile ARN that can access the target S3 bucket. EBS Volume Type The type of EBS volume that is launched with this cluster. EBS Volume Count The number of volumes launched for each instance of the cluster. EBS Volume Size The size of the EBS volume to be used for the cluster. Additional Details Spark Config To fine tune Spark jobs, provide custom Spark configuration properties in key value pairs. Environment Variables Configure custom environment variables that you can use in init scripts. Logging Path (DBFS Only) Provide the logging path to deliver the logs for the Spark jobs. Init Scripts Provide the init or initialization scripts that run during the start up of each cluster. -
-
After you create the job, click the job name to navigate to Databricks Notebook.
To add custom code to your integration job
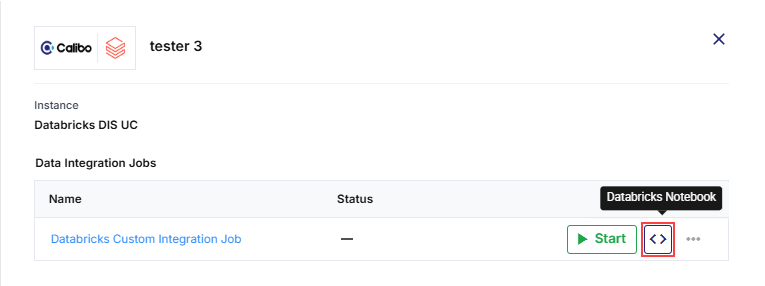
After you have created the custom integration job, click the Databricks Notebook icon.

This navigates you to the custom integration job in the Databricks UI. Review the sample code and replace it with your custom code.
To run a custom integration job
You can run the custom integration job in one of the following ways:
-
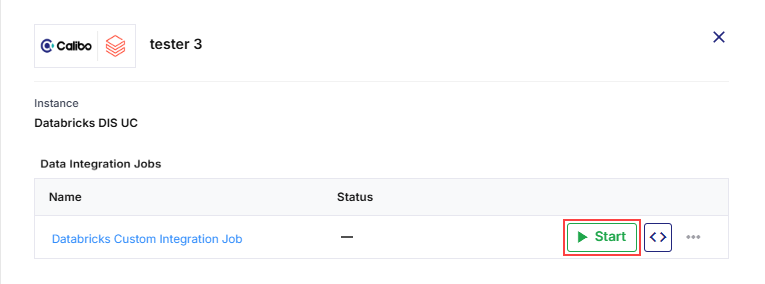
Navigate to Calibo Accelerate and click the Databricks node. Click Start to initiate the job run.

-
Publish the pipeline and then click Run Pipeline.
| What's next? Snowflake Custom Transformation Job |